October 13, 2015

Spooky Halloween Dinner Ideas


My kids love Halloween and insisted that we have a spooky dinner to celebrate the wonderful holiday.  I wanted a creepy, fun dinner, but also food that they would actually eat, and as always- simple and easy.  So here is what we came up with, which was a big hit and devoured quickly!

Bloody Brains and Fingers

Can't get much easier than spaghetti!  I added a little sign that said bloody brains and my kids were pleasantly grossed out enough.  :)  We added almonds to our bread sticks to make them look like fingers.
Best Punch- Hands Down :)
Everyone loved the punch with the floating hand.  :)  I just put water in a latex (non-powdered) glove and froze it.  I got the idea from an old roommate who was the queen of Halloween.  She used to make a bloody hand drink each year.  She would add cranberry juice and mixed berries in the water before she froze it in the glove to make it look bloody.  Her frozen bloody hand looked way better than my plain hand, but it served it's purpose just fine.  :)

Mud with Worms
Instead of using chocolate pudding (that my kids don't care for) I used chocolate ice cream and put a layer of crushed oreos in the middle of the ice cream and then on top with a few worms.  It was delicious!  The kids loved this as well as the adults.

Hope your Halloween is filled with lots of spooky, scrumptious treats!!

October 3, 2015

DIY Photo Canvas in 4 Easy Steps


When I went to my sister-in-laws wedding last year (yes I am so slow at blogging!) I fell in love with these photo canvases that they had hanging up around the reception.  And I couldn't believe it when she told me she had made them all herself and how cheap and easy it was.  I knew I had to try it myself, especially when I heard the words mod podge.  I love mod podge.  I have been mod podging photo prints on blocks for years now, and was excited to use this amazing wonder on canvas.

I watched this video on how to mod podge a picture on to canvas, and it is very straightforward and indeed easy.  In case you don't want to sit through a video, here are the 4 simple steps with some additional insight below:

Supplies:
 Mod podge (recommend matte)
Black acrylic paint
Paint brush (I use a foam brush)
Printed picture 
Canvas

What to do:

1. Paint black border (let it dry)
2. Paint the canvas with mod podge
3. Stick picture on.  Gently push down, rubbing out all air bubbles
4. Top with a coat of mod podge, make sure to the seal edges with mod podge

Step 1- Painting black border

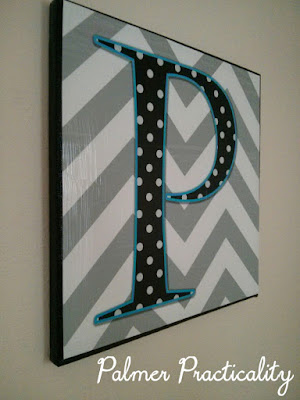
Step 2 & 3- Cover with mod podge, then place picture on canvas.


Step 4- Another coat of mod podge

*Additional tips:  I always like to put newspaper or a tablecloth down so I don't have to worry about paint spilling.  A blow dryer works great to speed up the process of the black paint drying.  To paint the sides more easily, I always place the canvas on a plastic cup or bowl.  Don't worry if the top coat of mod podge looks messy, it always dries clear.  

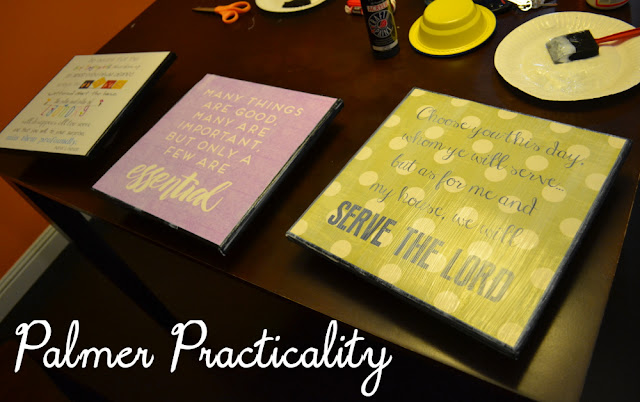
A few other DIY Photo Canvas Projects I've been up to...
Love how these simple, easy projects turn out!  They make such a beautiful addition to the home!

July 13, 2015

Captain America Shield Do a Dot


I searched for Avengers do a dots for my kids, but was surprised to fine none!  So I decided to make my own.  I started with Captain America's shield.  We'll see how ambitious I get designing more Avengers do a dots (considering I just posted about my daughter's Frozen Birthday party 6 months after it happened.  Whoops!)

(To save or print, click on the image you want. It will take you to the pdf that you can save or print. For personal use only).

July 9, 2015

Frozen Birthday Party Ideas

A few months ago we had a wonderful Frozen Birthday party for my 4 year old daughter.  Of course, with Frozen being so popular, there are a billion ideas out there.  Here is what I put together without having to spend a lot of money or time, and I was very pleased with the results!

The invitation we sent out (printed as a 4x6)

The girls loved dressing up!  (And of course every little girl owns a frozen costume.  Although we did mention that any princess costume was welcome).

Decorations: I kept our party decor very simple.  I got a bright blue tablecloth and blue polka dot ribbon to tie a few bows here and there.  I broke out a few snowflake decorations frm my Christmas boxes.  (I thought about hanging up icicles and white Christmas lights, but got too lazy). :) A friend dropped off a ton of Frozen balloons which made the house look very festive.

My favorite decoration (and the only one I really spent time on) was these 3D snowflakes that I hung from the ceiling.  They were easy and looked amazing.

Activities-

Do you want to build a snowman??
We made our own snowmen out of legos.  I had a bunch of these leftover snowman lego kits from target from a few years ago (around Christmas time, target often has little toy packages attached to gift cards.  A few years ago it happened to be lego snowman so we stocked up).  You could easily use any white legos though or make snowmen out of play dough.  The girls loved doing the legos!  (And so did the older ninja brother who you'll spot in some of the pictures).  :)

I made this printable to attach to each lego bag.  (I got the olaf picture from this site that has free frozen printables).

Ice Painting
I found this idea of ice painting with epsom salt on this website.  Honestly, the results weren't amazing, but the girls really enjoyed doing this and wanted to paint more than one paper.

Finding Elsa
In Frozen, Anna has to find Elsa, so I made a game out of it based off of one of our family favorites.  I made this little Elsa out of legos...
The rules:  Everyone leaves the room except one person, who hides Elsa in a completely visible spot somewhere in the room.  Then everyone comes back in and searches for Elsa. The person who finds her first is the winner and gets to hide her next (although we made sure everyone got an equal amount of turns).  The girls loved this game.  We played this several times since all of the girls kept wanting a turn.   

Can you find Elsa?  (Also a good view of the 3D snowflakes mentioned above )

Throwing Snowballs at Marshmallow
My talented husband drew me a huge Marshmallow (the snow monster from Frozen) that I hung up on our wall.  We had the girls throw these snowballs (made out of soft terrycloth material) at him.  (Just like Anna does in the movie).  There wasn't much to this game, but the girls enjoyed it.  We kept having them move back farther to see if they could still hit him and who could hit him from the farthest away.

Dance Party with a Bubble Machine
This was a huge hit!  Combine every little girl's favorite song, "Let it Go" with bubbles and you are set.  Everyone loved this part.  And we actually did this more than once throughout the party since it was such a huge hit.  The girls loved pretending the bubbles were snow.

Freeze Dancing
We also listened to the Frozen soundtrack while the girls danced, and every now and then, I would pause the music and they would have to freeze.  This was so fun to watch.  My daughter's friends still ask to play this game when they come over for play dates.

Freeze!
We moved outside to play a variation of red light, green light.  Our family calls it statues, but since it was a Frozen party we just called it Freeze.  One person is it and stands on the opposite side of the yard as everyone else, with his/her back turned to them.  You can only move when the person who is it is turned around (and can't see you).  When the person who is it turns around to face you, you have to freeze or you are sent back to the beginning.  So the person who is it, turns back and forth while the rest of the party tries to sneakily move closer to them without getting caught.  It's a lot of fun trying to watch 4 year olds try to freeze and for some reason their arms usually have to shoot up in the air.  :)  

Frozen Coloring Pages
We filled some extra time with coloring.  This was a great time filler and a nice break from all of our dancing and activeness.  There are a billion free Frozen coloring pages on the internet.  I printed off one for each girl.


And we were so lucky to have Olaf stop by the party! :)
(Found Olaf beanie at Kohls)


Food:

There are lots of ideas out there for Frozen themed food.  However, I just went with my daughter's favorite snacks.  I used blue frosting on the cupcakes and topped them with snowflake sprinkles.

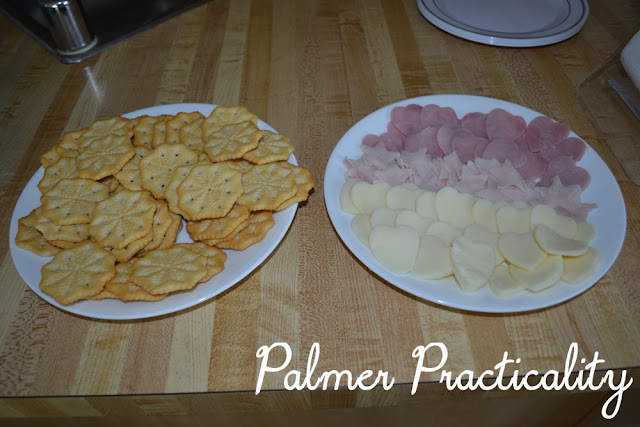
I did break out my Pop-Chef and cut our ham, turkey, and cheese in hearts and stars to go with our snowflake crackers (these were a ritz special edition this winter).  
The kids ate these too fast to appreciate their cuteness, so probably not worth the time! :)  

I really was lucky finding these snowflake water bottles on Christmas clearance for 9 cents each.  I sent them home with the girls, which they loved.
   
Goodie Bags:
My daughter had so much fun putting these party favor bags together.  Her Feburary birthday party was just perfect timing for a Frozen party since Target was filled with Frozen goodies in their $1 section.  We found Frozen rings, necklaces, stickers and pencil/notebook sets.  We included Frozen fruit snacks and sparkly blue nail polish. 


We also included white Olaf playdough
I bought white play dough for 50 cents from walmart, printed off the Olaf printable from the site mentioned above, then attached it to a piece of matching scrapbooking paper and then mod podged it all on the play dough tub.  Very simple and turned out so cute!

Found these Frozen bags at Daiso (similar to a dollar store we have here).  And attached each girls name to her bag.  Loved the way they turned out!

It was such a fun Frozen party and actually wasn't too much work.  And most importantly- my 4 year old loved it!

February 17, 2015

Gospel ABC Book


I put this children's picture book together for our Relief Society's Old Fashioned Homemaking activity.  I received a similar book a few years ago from my mother-in-law (who also did this book at a Relief Society activity).  My kids love looking at it during Sacrament meeting.  So since I was in charge of coming up with an idea for our own activity, I thought this would be a great idea to do.  It is a great gift for kids or grandkids, for Christmas or for those you visit teach.

I printed all of the pictures as 4x6's.  I found photo books at walmart for a $1.  (They came with 24 pages, so I put the letter A in the back of the front cover and Z in the front of the back cover so I could fit all 26 pages in).  Then I brought all of the pictures and photo books to the activity and the sisters put the pictures in the books.  It was a great and easy project that only took a few minutes to complete.


Not only do I love having another quiet book for my kids to look at at Church, but I love that they're learning important Gospel principles.  (And I tried to keep the text simple for young children to read).


Here is the link to download the pictures- Gospel ABC Book

Gospel Art came from the Media library on lds.org.  For personal use only.

February 16, 2015

Chore Chart Bingo

I came up with this chore chart to try to add some fun (and regularity) in my kids doing chores around the house.  When they do 5 of these chores and complete a bingo, I reward them with stickers or candy.  When they have completed all of the chores and achieve blackout then they get a bigger prize.  Maybe a trip to the dollar store or ice cream cone.  

Here is the chore chart bingo sheet I made-

I put it in a sheet protector to help it last longer.  (It would be cute in a frame but I was too lazy to make it look nice).  :)  My kids use a dry erase marker to mark off the chores they complete.  They always get excited when they complete a bingo.  My favorite square is Mom's choice which allows me to choose anything around the house that I need done.

November 15, 2014

DIY Homemade Lightsaber


October- a time for pumpkins, candy, caramel apples, and your kid changing his mind a billion times about what he will be for Halloween.  At least that is what happened in my house.  :)  The week of Halloween, my son finally decided that he was going to be Darth Vader for Halloween.  He already had the mask and cape, so that made things easy.  The only thing he was missing was a red lightsaber.  I almost just bought one, but all of the cheaper lightsabers I found had terrible reviews.  And these homemade lightsabers are still our favorite for lightsaber battles and playtime, so there was no need for spending a lot of money.  So I began to think about how I could make a red lightsaber.  Maybe red duct tape, red siran wrap?  I went to walmart and they didn't have either of those two things.  Then I wandered over to the Christmas section hoping I would find something red that would inspire me.  Something indeed caught my eye.  Red shiny foil wrapping paper.  It was perfect.  This $1.25 wrapping paper would make a perfect lightsaber.  The shininess of the foil paper was perfect for the illumination of a lightsaber.  I probably could have just used the whole roll of wrapping paper itself, but I didn't want to waste the paper (I could use it in 2 months for Christmas!) and I thought the roll might get a little smashed in my son's hand all night.  So I grabbed some pvc pipe I had in my garage from an old shelf.  I taped 2 pipes together and then rolled the wrapping paper around it and sealed it with glue.  Took less than 5 minutes.  Talk about cheap and easy!   

For the handle I used silver and black duct tape and drew some buttons on with permanent markers.

This $1 (and change) homemade lightsaber was the perfect accessory for my son's Halloween costume and looked great in all our pictures!


He has already put in a request for a green lightsaber next. :)