Showing posts with label Homemade Toys. Show all posts

November 15, 2014

DIY Homemade Lightsaber


October- a time for pumpkins, candy, caramel apples, and your kid changing his mind a billion times about what he will be for Halloween.  At least that is what happened in my house.  :)  The week of Halloween, my son finally decided that he was going to be Darth Vader for Halloween.  He already had the mask and cape, so that made things easy.  The only thing he was missing was a red lightsaber.  I almost just bought one, but all of the cheaper lightsabers I found had terrible reviews.  And these homemade lightsabers are still our favorite for lightsaber battles and playtime, so there was no need for spending a lot of money.  So I began to think about how I could make a red lightsaber.  Maybe red duct tape, red siran wrap?  I went to walmart and they didn't have either of those two things.  Then I wandered over to the Christmas section hoping I would find something red that would inspire me.  Something indeed caught my eye.  Red shiny foil wrapping paper.  It was perfect.  This $1.25 wrapping paper would make a perfect lightsaber.  The shininess of the foil paper was perfect for the illumination of a lightsaber.  I probably could have just used the whole roll of wrapping paper itself, but I didn't want to waste the paper (I could use it in 2 months for Christmas!) and I thought the roll might get a little smashed in my son's hand all night.  So I grabbed some pvc pipe I had in my garage from an old shelf.  I taped 2 pipes together and then rolled the wrapping paper around it and sealed it with glue.  Took less than 5 minutes.  Talk about cheap and easy!   

For the handle I used silver and black duct tape and drew some buttons on with permanent markers.

This $1 (and change) homemade lightsaber was the perfect accessory for my son's Halloween costume and looked great in all our pictures!


He has already put in a request for a green lightsaber next. :)

October 16, 2014

Homemade Teenage Mutant Ninja Turtle Costumes

My son's latest obsession- Teenage Mutant Ninja Turtles.  I remember dressing up as Teenage Mutant Ninja Turtles when I was little!  Perhaps that's part of the reason (and the fact that I'm cheap!) that I just couldn't bring myself to paying so much for the expensive turtle costumes and accessories in stores.  So here are some cheap and easy ideas of how to help your child transform into a ninja turtle!


Leonardo- blue bandana and 1 noodle cut in half.  Leonardo's actual weapons are knifey sword things... I think's that's the actual name.  :)  Ok, maybe they're actually known as twin katanas. I found foam swords at target in their dollar section that looked good, however, as my 5 year old even observed- the foam swords break easily and aren't as good for actual playing.  So we like the noodles since they hold up well as we've learned from past experience.

Rafael- red bandana and twin sai (forkey things).  For Rafael's weapon, I just cut the fork shape out of a card board box and then wrapped it with silver duct tape on top and black duct tape on the bottom.  I used 2 pieces of cardboard in each one to make it more sturdy.


(Here's a picture of the sai before I added the black duct tape)

Michelangelo- orange bandana and nunchucks.  I got lucky and found these nunchucks at the dollar store.  Before finding these dollar nunchucks, we used baby linking rings for our nunchucks.  (You can spot them in my daughter's belt in the pictures below).


Donatello- purple bandana and bo staff (noodle with black duct tape).


Turtle shirts- I found the turtle shirts at kohls for about $6 each.  (Target also had similar shirts).  You could also get plain green t-shirts if you're looking for something a little cheaper.

In my browsing, I did see several turtle masks (ranging from cheap paper ones for a few dollars to plastic masks for $10) but I passed on them and went with bandanas instead.  Not only were the bandanas cheaper and reusable, but they are far more comfortable for kids to wear and play in.


3 Happy Turtles :)

I was tempted with my son's birthday around the corner to purchase the $15 TMNT shell I saw at several stores.  But that didn't even come with a weapon and would cost another $10-20 for that. So instead I grabbed a free cardboard box from my garage and started with that.  :)


I turned the box inside out and used an x-acto knife to cut slits into the back so I could pull a ribbon through for arms straps and then knotted the ribbon on the inside.  (Wears like a backpack).  My son's favorite turtle is Leonardo, so we cut 2 circles in the top so he could store his weapons in his shell.  (This was one of his favorite parts.  I also thought of putting a belt through the shell to hold the weapon, but my son loved the idea of having slots in the shell for his weapon).  Then I taped the box shut.  And my son drew lines on the box to make it look like a shell.


Not quite as flashy as a TMNT shell you can purchase at the store, but for my 5 year old, he thinks it's the coolest thing ever.  And the next day, he wanted to make another one for his sister so she could be a turtle too.  :)


I recently heard the quote- "If you want your children to turn out well, spend twice as much time with them and half as much money."  I could definitely see how spending time together on this project was far more valuable than if I had just purchased the toy from the store.  My son and I had a blast making his turtle shell.  I loved hearing his creative input as we constructed it, intermixed with stories about him and his friends playing turtles at recess.  It was a fun project to do together, not to mention it saved me at least 20 bucks that I can put towards the next thing he's obsessed with.  :)  

Click here for Teenage Mutant Ninja Turtles Birthday Party Ideas!

July 2, 2014

Lightsaber Popsicles


Anyone who has talked to my 5 year old son for more than 2 minutes knows that he is obsessed with Star Wars!  So when a friend showed me these lightsaber popsicles, I of course had to make them for my family.  They are super easy and fast to make.  All you need is felt, scissors and a glue gun.  

I was amazed that you couldn't feel the cold otter pop underneath the felt at all.  My kids have always complained about cold hands with otter pops, so this idea was not only fun but brilliant as well.  What a perfect summer treat!  (And a great idea for a Star Wars themed birthday party!)

Warning: These lightsaber popsicles might lead to lightsaber battles breaking out so do not leave children unsupervised. :)


February 20, 2014

How to Make Easy, Cheap, No-Sew Tutu

This is the easiest, cutest homemade tutu ever!  I made one a few years ago for my little princess turning one.  It made such a cute accent in all of the pictures we took that day.  And it was quick to make!  The only things I used were elastic and tulle (which cost a few dollars total).  This tutorial explains the easy process very well.


For my daughter's 3rd birthday, I decided to add some ribbons to the tutu.  It was a cute touch but more than doubled the cost of the tutu.  So I'm not sure adding the ribbons was worth it.  But I still love the simpleness and cuteness of this homemade tutu.  It's a fun way for your little princess to stand out on her birthday or to turn any day into a special occasion.

February 19, 2014

Homemade Tablet Holder for Car

We have found that long trips in the car go so much smoother when our kids have a movie to watch.  After months of having my kids hold my tablet in their hands, I decided we needed a better plan.  I went online to purchase a tablet holder for the back of the seat in our car, but I was amazed at how expensive they were.  I thought it probably wouldn't be that hard to make one, so I decided to take that route instead.  This project began before I had a sewing machine, so I constructed this tablet holder with as little sewing as possible.  (If I were to make it again using a sewing machine, I probably would have planned it a little differently and could have saved some time, but it works efficiently nonetheless).

This is what the tablet holder looks like.  To limit on sewing, I kept all of the fabric as one piece, except for the top strip of fabric running across the top of the tablet.  I had some leftover clear vinyl from my quiet book which provided a clear screen over the tablet while also holding it securely in place.  I started by rolling up the bottom edge of my large rectangular piece of fabric and sewing that to the vinyl.  I then sewed my top strip to the top of the vinyl.  Then I rolled the sides of the main fabric in and sewed that to the vinyl as well.  I hemmed the top so it looked nice and neat.  Then I sewed elastic to the back, about the same size as the seat's headrest in the car.  Lastly I attached velcro to the top of the fabric and the strip above the tablet.  (Once again, to minimize sewing, I decided to just roll the top down rather than having to sew anything in place).  I made sure to constantly put my 7" tablet in the holder as I made it, to make sure I wasn't making the holder too small.


Backside

There are a billion different ways one could design this, and like I said I probably would do it a little different if I made it with a sewing machine.  But it's been working great so far.  The fabric is thin enough that I can still access the on/off and volume button without taking the tablet out of the holder.  And the tablet is responsive through the vinyl.  Since I already had the fabric and the vinyl, I ended up spending just a few dollars on the elastic and the velcro so it was a very cheap project to complete.  

November 7, 2013

Homemade Lightsabers

Here is an easy, cheap, (and kid-friendly) way to make a lightsaber for any Star Wars fan.  We found these silver mugs at the dollar store.  We also purchased noodles from the dollar store that we cut in half.  The noodles fit perfectly into the mug without any tape or glue needed.  The noodles are snug enough in the mug that they stay put during lightsaber battles between our kids.  And we have yet to experience any injuries with these homemade lightsabers so I'm just as happy as my kids.  :)


*Update: After many hours of lightsaber battles with these homemade lightsaber noodles, we decided that we preferred to just use the noodles and we got rid of the cups.  The noodles are by far my favorite thing to use for lightsaber battles since you do not have to worry about anything breaking or anyone getting hurt.  To make the noodles look more like lightsabers, instead of using the cups, you could use silver and black duct tape at the bottom to make it look like a handle.  

October 17, 2013

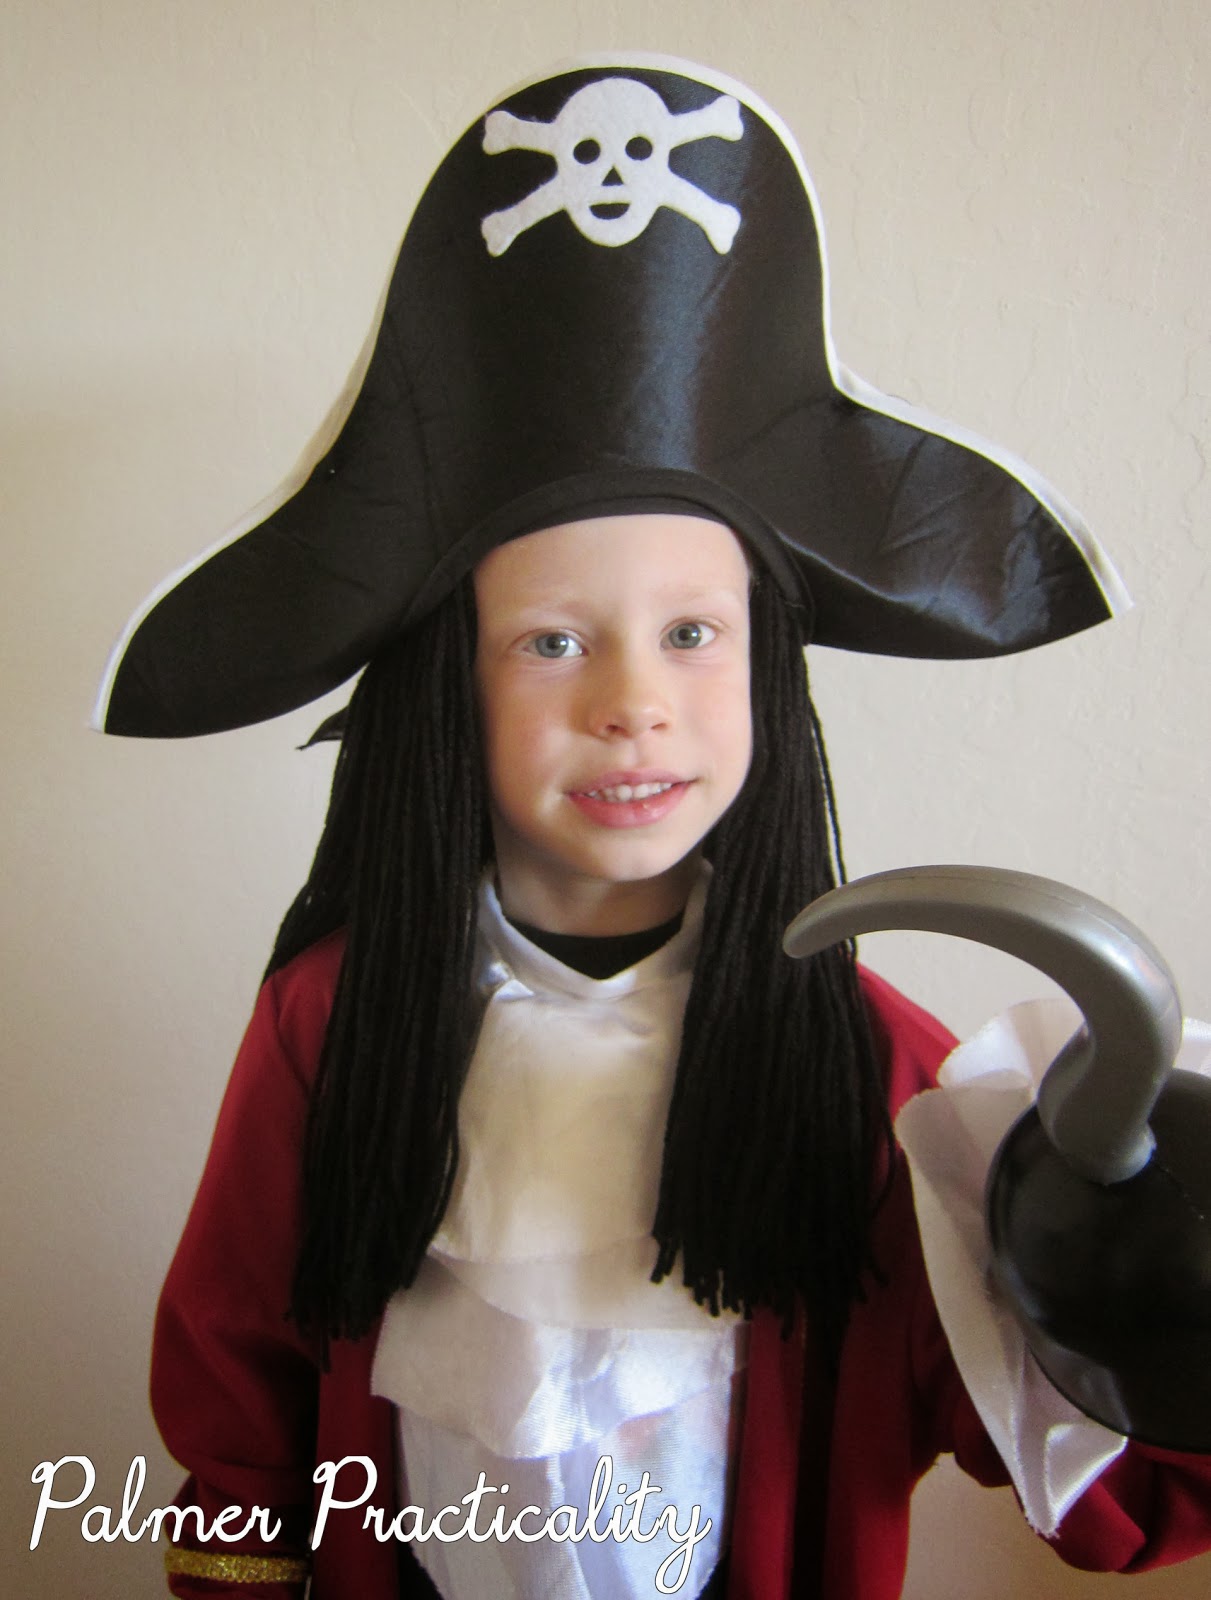
Homemade Pirate Wig

My son is so excited to be Captain Hook for Halloween.  He is a little obsessed with Captain Hook and pirates.  He already has a Captain Hook costume from Grandma, but he really wanted long black hair to go with his costume.  I didn't really want to buy a wig or spend a lot of money, so I decided to make a wig out of yarn.

  I found some elastic I had laying around the house, sewed it together making a little headband to fit the crown of my son's head.  Then I cut pieces of black yarn (about 2 ft long).  I folded the yarn in half and held it over the elastic as shown in the picture- 


Then I pulled the ends behind the elastic, up through the loop


Then pulled the ends down, so the yarn lays flat and there is a little knot at the bottom of the elastic


Repeated this process until I had a headband of yarn all the way around, except for the front.  I constantly pushed the yarn closer together to make it nice and full.  
(Used less than one skein of yarn)


Looks great under a bandana or pirate hat


Throwing a pirate birthday party??  Check here for some ideas.

October 16, 2013

Quiet Book

(Cover- made out of soft flannel)

I really wanted to make a quiet book for my kids, mainly to keep them quiet and busy at Church or when we are traveling.  I scanned the internet for cute quiet book ideas, and my favorite site by far was Imagine Our Life.  Not only are there countless ideas of the cutest pages I've ever seen, but the author includes free templates for her pages.  So it's very easy to make your own pages and it did not require a ton of sewing.  Most of my pages were inspired from that website, and then I made a few of mine own.

Brushing Teeth

Toothbrush and toothpaste come out of cup


Animal Train

Animals are finger puppets


Matching Socks

I loved using magnets over velcro so there is no noise


Beads and Numbers


Making Cupcakes

(Oven on the left opens and has magnets underneath the handle to hold it shut)


ZippersI also sewed in a couple of pockets on my back page so I could stuff crayons, paper, or whatever else I need to in the quiet book.  The pockets are also very convenient if you don't have time to put all of the pieces back in their spots.  Just stuff the pieces in these pockets and sort later. 

October 8, 2013

Cardboard Box Train

Have you ever given a child a really cool gift that you're so excited about, but all they want to do is play with the box?  Children have great imaginations and here is a great project for them to work on. (And talk about cheap entertainment as well!)  I like to turn the box inside out, so there is lots of room for coloring, and then we transform the box to whatever is my son's latest obsession- trains, fire trucks, ambulances, etc.  We use a paper plate for the wheel, attached by a brad.  And it's a huge hit.  It may not look like much to a grown up, but little kids love it, especially when they get pushed around in their new creation.  

October 7, 2013

Homemade Drum

Supplies:
Empty 5 quart ice cream bucket
felt
yarn
beads
scrapbooking paper
mod podge
wooden sticks


Cost: $1

Every time that my family went to target, my 4 year old son insisted on playing with one of the drums in the toy section.  It was a cool drum, but it cost $20 and I felt like that was too much.  So I decided to make him his own.  I saved an old 5 quart ice cream bucket.  Mod podged the scrapbooking paper around the bucket.  I added a strap I got off an old water bottle, used brads to connect it to the bucket.  Placed felt on the top and bottom, connected the felt with yarn and added some beads for decoration.  The only thing I bought were the wooden sticks that were a $1 at walmart for a 12 pack.

My son was so excited on Christmas!